Tuesday, 21 January 2014

The Age Of Aquarius

It's time for another Craft-Room Challenge and this time it's the turn of Esther to choose the theme, here's what she has to say about her choice.
This fortnight I'm asking for all things Water based as we are now in the Sign of Aquarius - The Water Bearer. This means you can either use a water based technique i.e. water colour pencils/paints, or a water themed image.

Our sponsor this challenge is Tando Creative.


For my DT piece I've made a mermaid tag. It wasn't very good lighting when I took the photo so the colours aren't as good as they should be.


For the background I swiped a Caribbean sea Kaleidacolour ink pad across my craft mat and sprayed water on it then I coloured my tag with it. When the background was dry I sprayed it with water. 
I stamped the Clarity Stamp mermaid onto the tag and also onto some white card. I coloured her body with a felt tip and her tail with Sakura gelly roll pens then I cut her out and adhered her over the image on the tag.
I embossed a mixture of aged aqua and aged marine Frantage at the bottom of the tag and adhered some shells and a metal starfish charm. 
I stamped the Hobby Arts sentiment onto card and adhered it to the tag.

Monday, 20 January 2014

Kraft Cards

Hi everybody, I hope you've all had a good weekend. Today I'd like to share a couple of cards with you.


I stamped the small flower onto kraft card by colouring my Penny Black stamp with a picket fence Distress marker. I used an orange felt tip to colour the Stamp Addicts stamp then I layered it onto a kraft card blank with some orange and black card.


For this card I used an image that I'd stamped ages ago, I think it's a Penny Black stamp.

Tuesday, 14 January 2014

Inchie - Amulet

The theme for this weeks challenge at Every Inchie Monday is Amulet. I wasn't sure what to do for this one until I remembered that I had some gem embellishments.


I adhered the embellishment to a piece of card that had been covered with sticky backed aluminium and then I adhered this to some red and gold card.

Tuesday, 7 January 2014

Craft-Room Challenge - Picture Inspiration

It's time for the first Craft-Room Challenge of the year.

We have a great FB group sharing not just these challenges but all sorts of crafty ideas. One of our group is Christine Cesar from France and she has chosen a Picture Inspiration for this fortnights challenge.

This is what Christine has to say about her challenge :
Dear crafters I am happy to be Zoe and DT members guest for this challenge. I will ask you to capture the spirit of the card and do your own card or page featuring what you extract out of it. Hoping you will have fun to challenge with me.

Christine's picture inspiration.

Our sponsor for the challenge is Ali Craft who are giving one winner drawn at Random £10 to spend at their on line shop.    


For my DT piece I've made a collaged postcard using New York, Time, Taxi, Flag and America as my inspiration from the picture.


For my collage I used
Statue of Liberty and taxi images - the Internet.
New York and flag images - Gecko Galz.
Phineas Pinchbeck stamped image - The Artistic Stamper.
I used an embossing folder for the background, there is also some tissue tape, postage stamp, watch charm and some net material on there.

Why not visit the Craft-Room Challenge blog and see what inspiration the rest of the DT took from Christine's picture.

Monday, 6 January 2014

Inchie - Alice Blue

The first challenge of the year at Every Inchie Monday is Alice Blue, the first thing that came into my head was Alice Blue Gown, so I drew a dress, I put stickles on it and the photo makes it look like it's got coloured dots. After I drew it I cut it out and adhered it to some coloured card.


Saturday, 4 January 2014

First Cards Of The Year

I have quite a few birthday cards to make this month - the first three cards that I'm sharing with you were very simple to make.  I used a Chapel Road Art Stamp for the main image.


The image is stamped onto white card and matted onto black card and then onto a white card blank.  I scribbled some lines on  the edges and added some pearls.


After stamping I masked the face and sponged distress ink over the image then matted it onto black card then onto a kraft card blank. I removed the mask and added some gems and scribbled some lines on the edges.


After stamping I masked the face and sprayed with a mica spray then I matted it onto some purple mirri card. Th card blank was sprayed with the mica spray. I added pearls and a ribbon.

Monday, 30 December 2013

Inchie - Time

It's time for the last inchie of the year at Every Inchie Monday and I can't believe that I've managed to make all 52 inchies. I've not been very good at blogging this year so you haven't seen them all but I've added the missing ones to the end of this post.

Here is this weeks inchie - the word is Time.


Here are my missing inchies.

Danger Notice

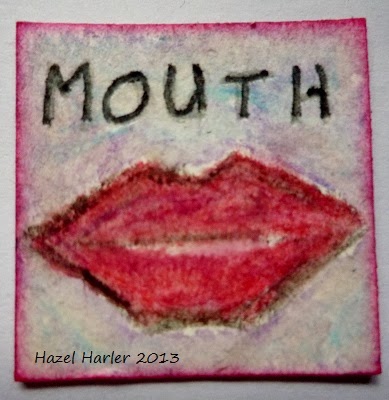
Mouth

Old - Master

Rope

Jacket

Found

Joy

Food


Sunday, 22 December 2013

Bah Humbug

I was thrilled to bits when I got an email from Chris at Country View Crafts Challenges telling me that I'd made the top three in the October challenge and was even more thrilled when I was asked to be a Guest Designer for December.

When I found that the theme for the December challenge is Bah Humbug it took me back to my teacher at junior school sitting the class down and reading A Christmas Carol by Charles Dickens to us - it became one of my favourite books.

I decided that my project should have something to do with Scrooge on it - I searched the Internet and found an image of Scrooge being visited by the Ghost of Christmas Present [my favourite ghost] and have used it on my Christmas canvas.


Supplies

Canvas.
Red paint.
Martha Stewart snowflake punch.
Corrugated card.
Shabby white Frantage embossing enamel.
Christmas papers.
Scrooge image of the Internet.
Gecko Galz snowmen and music images.
The Artistic Stamper Santa stamp.
Distress Inks.
Sizzix tattered pine cones die.
Sizzix holly branch die.
Spellbinders die.
Wooden snowflakes.
Ice Stickles.
Ribbon, lace and beads.

I adhered some strips of punched snowflakes to the sides of the canvas and then painted the canvas red, I wiped some of the paint of the snowflakes before the paint dried.
I coloured the back of some patterned paper with distress ink so that when I distressed the edges the white background wouldn't show.
I edged a square of corrugated card with some Frantage embossing enamel, adhered  the distressed papers and added the ribbon and lace, then I adhered it to the canvas.
The Santa image was stamped and coloured with distress ink, I die cut the Santa image and snowmen images and edged them with distress ink then adhered them to the canvas.
I made the pine cones and adhered them to the canvas with the holly and beads.
I painted some wooden snowflakes white and added some stickles. I used a lot of stickles on the canvas so it's very glittery - the photo doesn't show it very well.

Here is a side view of the canvas.

Monday, 16 December 2013

Gecko Galz Cards

Here are a couple of cards that I made using images from Gecko Galz.


Image from the Gecko Galz Vintage Card Toppers Collage Sheet.
Background Paper from the Gecko Galz Blue Willow Paper Set.
Turquoise Card Blank.
Turquoise Card.
Lace.
Peacock Feathers Distress Ink.
Beads.
Sentiments.
 
If using white lace die it with the peacock feathers distress ink.
Layer the background paper, lace, turquoise card and image onto the card blank. Adhere the beads and sentiments.

 
Image from the Gecko Galz Nouveau Art Collage Sheet
Paper from the Gecko Galz Miss Muffet paper set.
Card blank
Green Card
Lace, flowers and pearls
 
Adhere the paper to the card.
Matt the image to the green card and then adhere the lace to the back, adhere this to the card blank.
Adhere the flowers and pearls.

Tuesday, 10 December 2013

Favourites

It's time for another Craft-Room challenge, the theme is Favourites and it has been chosen by Debi. She would like everyone to share their favourite creation from 2013

As always we have a brilliant prize, this time from our sponsor Crafty Individuals.


For the challenge I've chosen a card that I made for the Yellow and Blue make Green challenge in June.


I loved the way this card turned out, my favourite thing about it is the colour combination as green is my favourite colour, I also love the effect of colouring card with distress inks and flicking water over it. You can find my original post here.

Please take a visit to the Craft-Room Challenge to see what the rest of DTs favourites are.


Monday, 9 December 2013

Christmas Tree Ornament

This month the Gecko Galz  DT are making Christmas ornaments, every couple of days one is being showcased, today it's my turn to have my ornament showcased.
I have made a Christmas tree decoration using a wooden bauble blank.


Image from the Gecko Galz Old Fashioned Christmas Collage Sheet.
Gecko Galz Holly Days Background Paper.
A Wooden Christmas Bauble Blank.
Green Acrylic Paint.
Americana Dura Clear Matte Varnish.
Sizzix Festive Greenery Strip Die.
Green and Gold Card.
Ice Stickles.
Red Beads and red ribbon.
Paint the wooden bauble green.
Adhere the Image to the front and the background paper to the back of the bauble, then cover with a couple of coats of the varnish.
Die cut a couple of flourishes with the gold card and some holly leaves with the green card, adhere them to the bauble, then add the beads.
Put some stickles on the holly and on the holly round Santas head.

When the stickles are dry add the ribbon.

This is the back of the ornament.


Thursday, 5 December 2013

Here is one of my Gecko Galz DT pieces using the lovely December products.


Image from the Beauties In Black Collage Sheet.
Background Paper from the Blue Willow Paper Set.
Kraft Card Blank.
Piece of Kraft Card.
Square Doily.
Blue Ribbon.
Sentiment.
Wooden Butterflies.
Chipped Sapphire Distress Ink.
Silver Button
Frosted Lace Stickles
 
Layer the image, kraft card, background paper and doily onto the card blank.
Make a bow with the ribbon and adhere to the card with the button.
Colour the butterflies with the chipped sapphire and cover with the stickles then add them to the card.
Adhere the sentiment.

Tuesday, 26 November 2013

A Vintage Christmas

It's time for another Craft-Room Challenge, Mervi is the hostess and as Christmas is only a month away she would like to see some vintage style Christmas cards or presents.

Our sponsor for the challenge is Rogue Redhead.


I've made a card for my DT piece.


I wrapped some ribbon round some Gecko Galz holly background paper and adhered it to a card blank. The image was stamped with walnut stain Distress ink and adhered to a square doily. The holly leaves were covered with Ice Stickles before I put them on the card, then I added some red beads. I adhered some die cut icicles and covered then with the stickles, I also put some stickles on the image.

Items used
Personal Impressions - the stamped image.
Sizzix Holly Branch die.
Marianne Designs Icicle die.

The rest of the design team have made some fabulous samples and would love you to visit the Craft-Room Challenge to take a look.

Sunday, 17 November 2013

Frosty The Snowman

I'd like to share with you a couple of Christmas cards that I've made for Gecko Galz using the lovely Frosty collage sheet from the November products.


Image from the Frosty collage sheet
Paper from the Little Miss Muffet paper set
Mauve card blank
Mauve card
Dusty concord Distress ink
Versamark ink pad
White Frantage embossing enamel
Ribbon, sentiment, wooden snowman
 
Tear the paper and adhere to the card, edge with the distress ink.
Sprinkle the Frantage over the card and heat from underneath to melt it.
Attach the ribbon.
Matt the image onto the mauve card and edge with the distress ink, then adhere it to the card,
Cover the little snowman with Versamark and Frantage embossing enamel, when it’s melted add it and the sentiment to the card.
 
 
Image from the Frost Collage Sheet
Paper from the Miss Muffet Paper Set
Dark blue DL card blank.
Dark blue and silver card.
Stickles.
Blue ribbon and a snowflake charm.
Martha Steward snowflake border punch.
Gems.
 
Adhere two strips of the paper to the card blank.
Matt the image onto the blue card and silver card, add the ribbon and charm and adhere to the card blank.
Diecut a strip of snowflakes from the silver card and adhere to the card blank then add the gems.
Add dots of stickles to the outside part of the image.


Tuesday, 12 November 2013

Afternoon Tea

Another fortnight has flown by and it's time for another Craft-Room Challenge, It's Suzannes turn to choose the theme and she has chosen the theme Afternoon Tea. Here's what she has to say about her challenge.

My challenge then is a bit of a change - I thought I would give you a choice!  There is a photo inspiration with the title of:-
Afternoon Tea!

 So create anything crafty to do with Afternoon Tea or any inspiration drawn from the photograph please!

We are sponsored by "The Stamp Man" and the Winner will get £10 to spend at their online shop.


For my DT piece I have made a card.


I started with a white card blank and edged it with blue ink then I adhered a piece of Crafty Individuals paper. I stamped the teapot and masked it then I coloured the card pink and stamped the leaves. I removed the mask and coloured the teapot with coloured pencils. I matted this onto some blue card then I adhered it to the card blank. I added the ribbon, charm and some pearls. The teacups were stamped onto white card and coloured with the pencils, I then cut it out and adhered it to the card.
The stamps I used are 
Inkidinkido for the leafy background
Crafty Individuals for the main image.